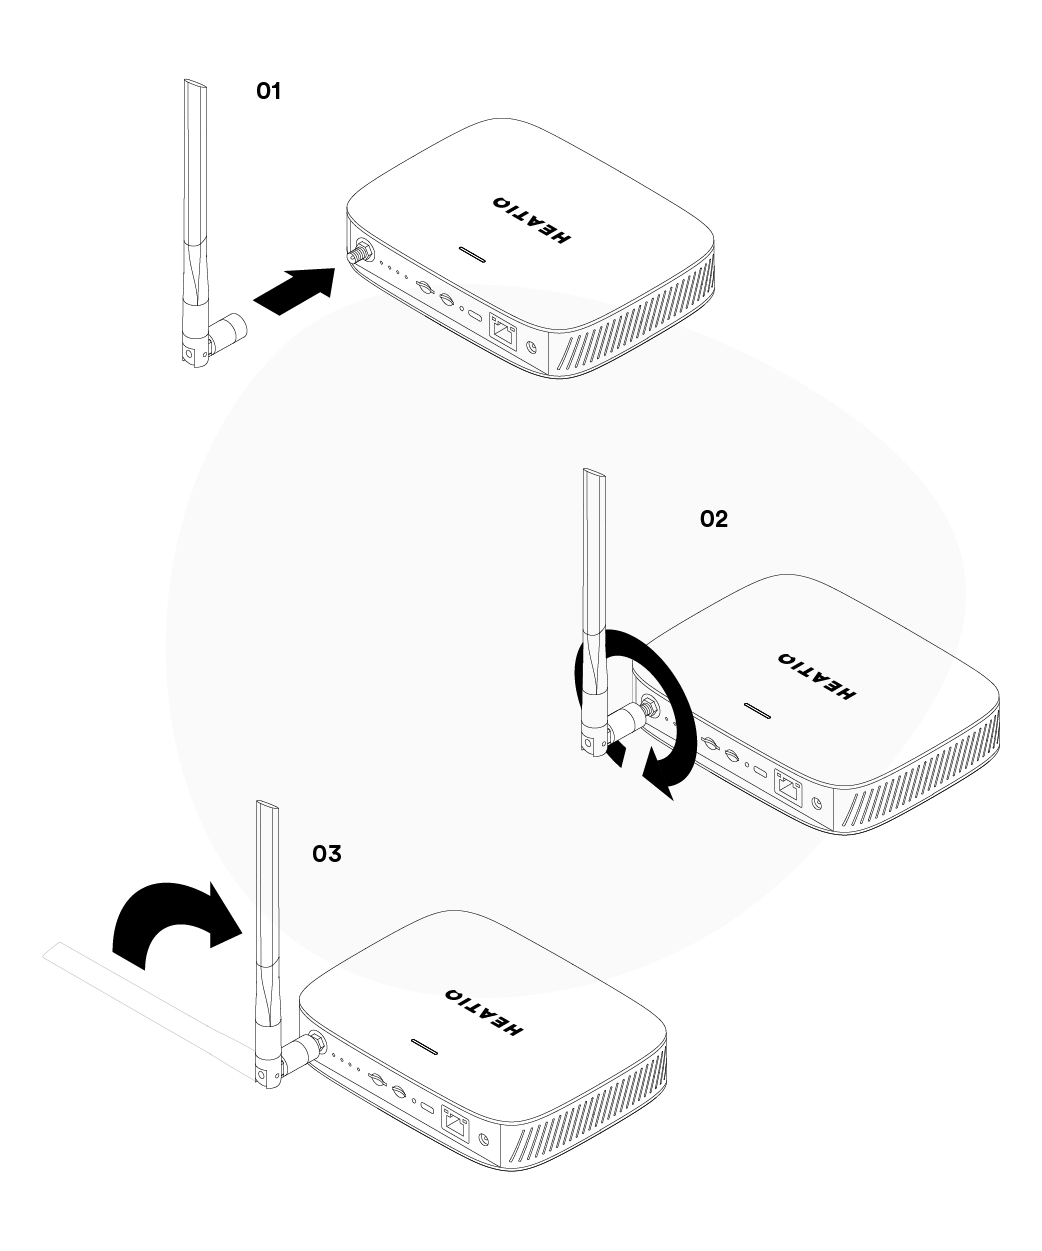
Attach your antenna
First, remove the black tip on the antenna crew connector.
Then screw the antenna tight. You can do this with the antenna extended (as received in the box) or bent at a 90 degree angle as depicted in the photo.
Once screwed in, make sure that it's perpendicular to the gateway (upright as shown in the photo) and it's tightly screwed.
Connect to internet
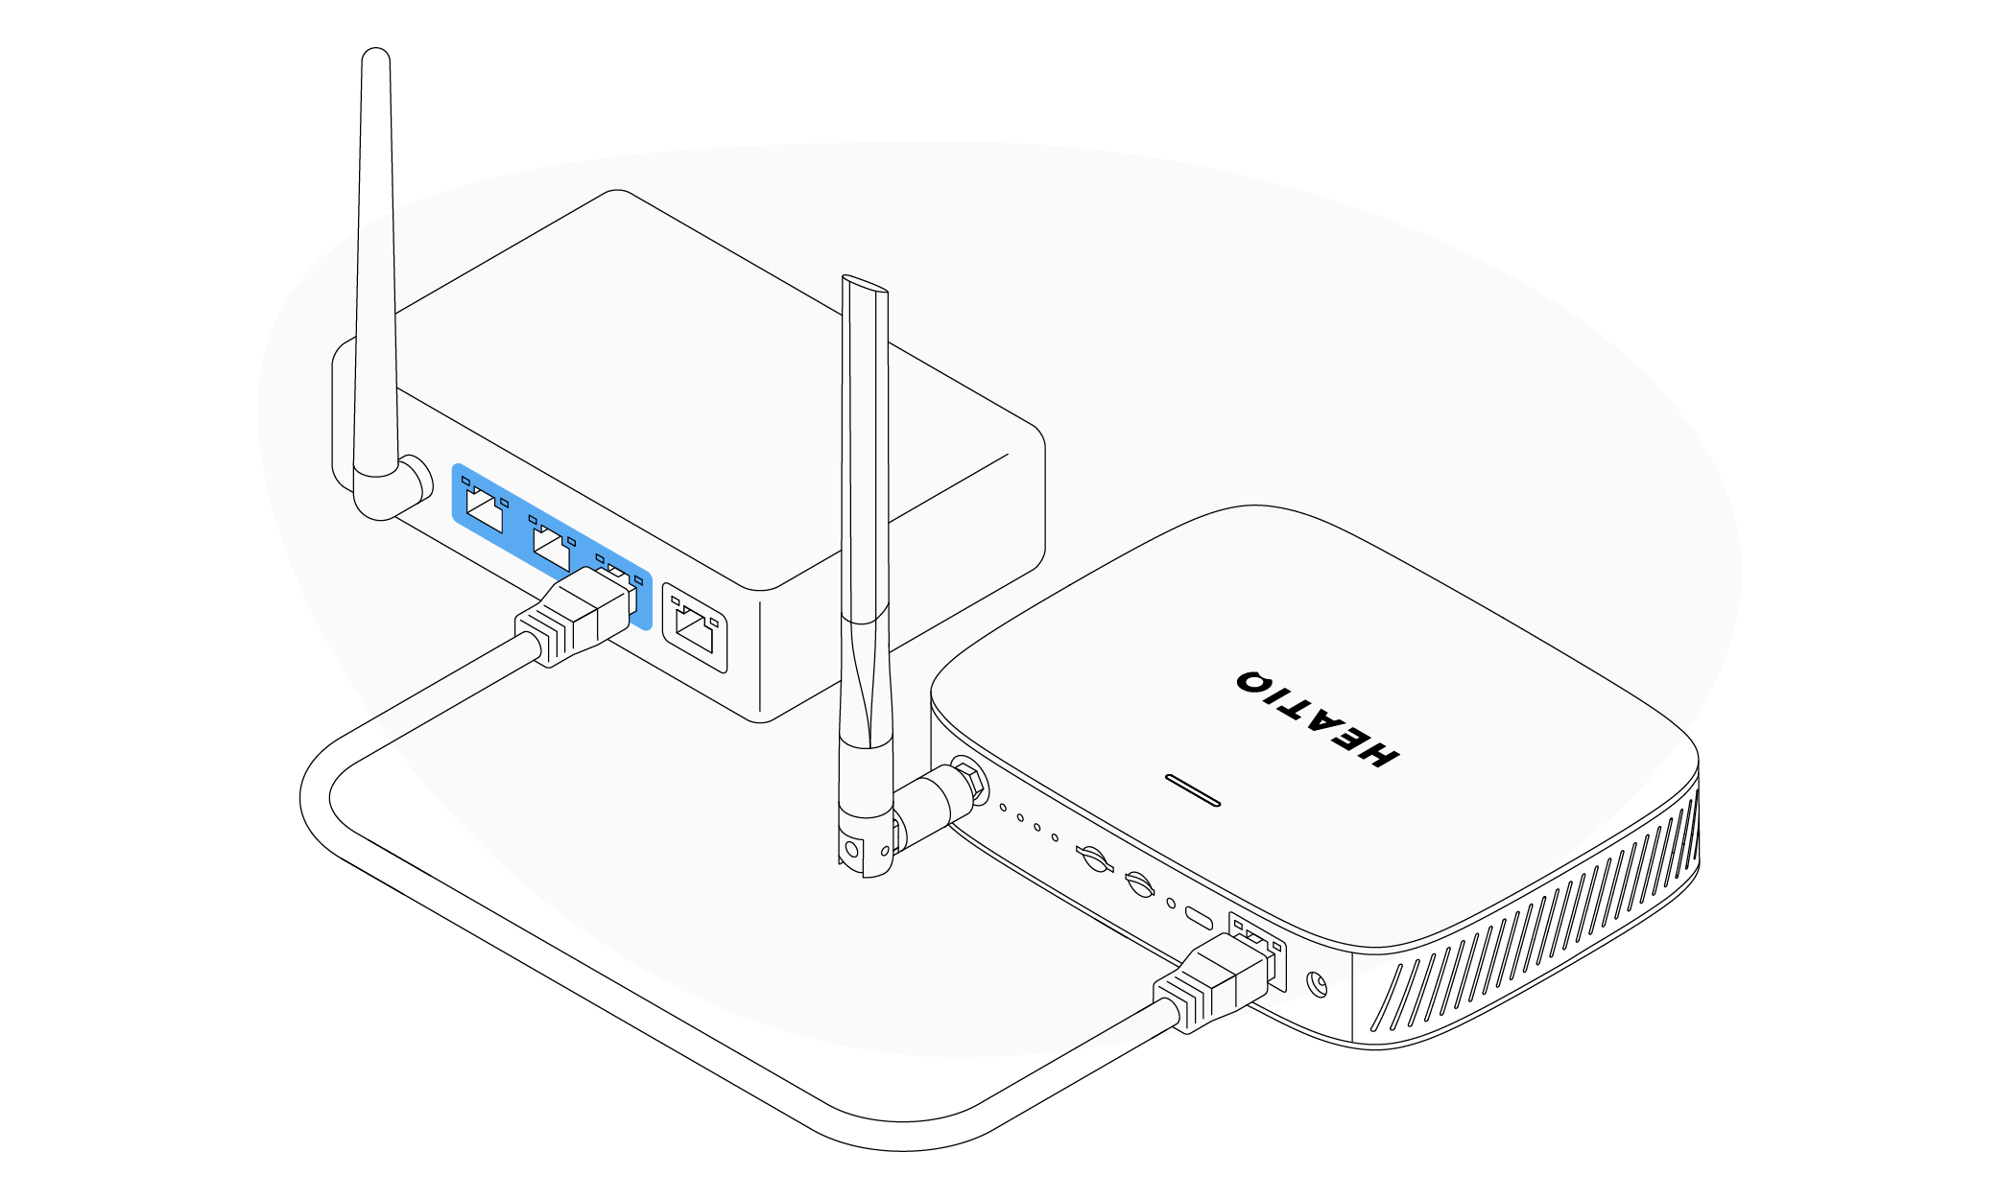
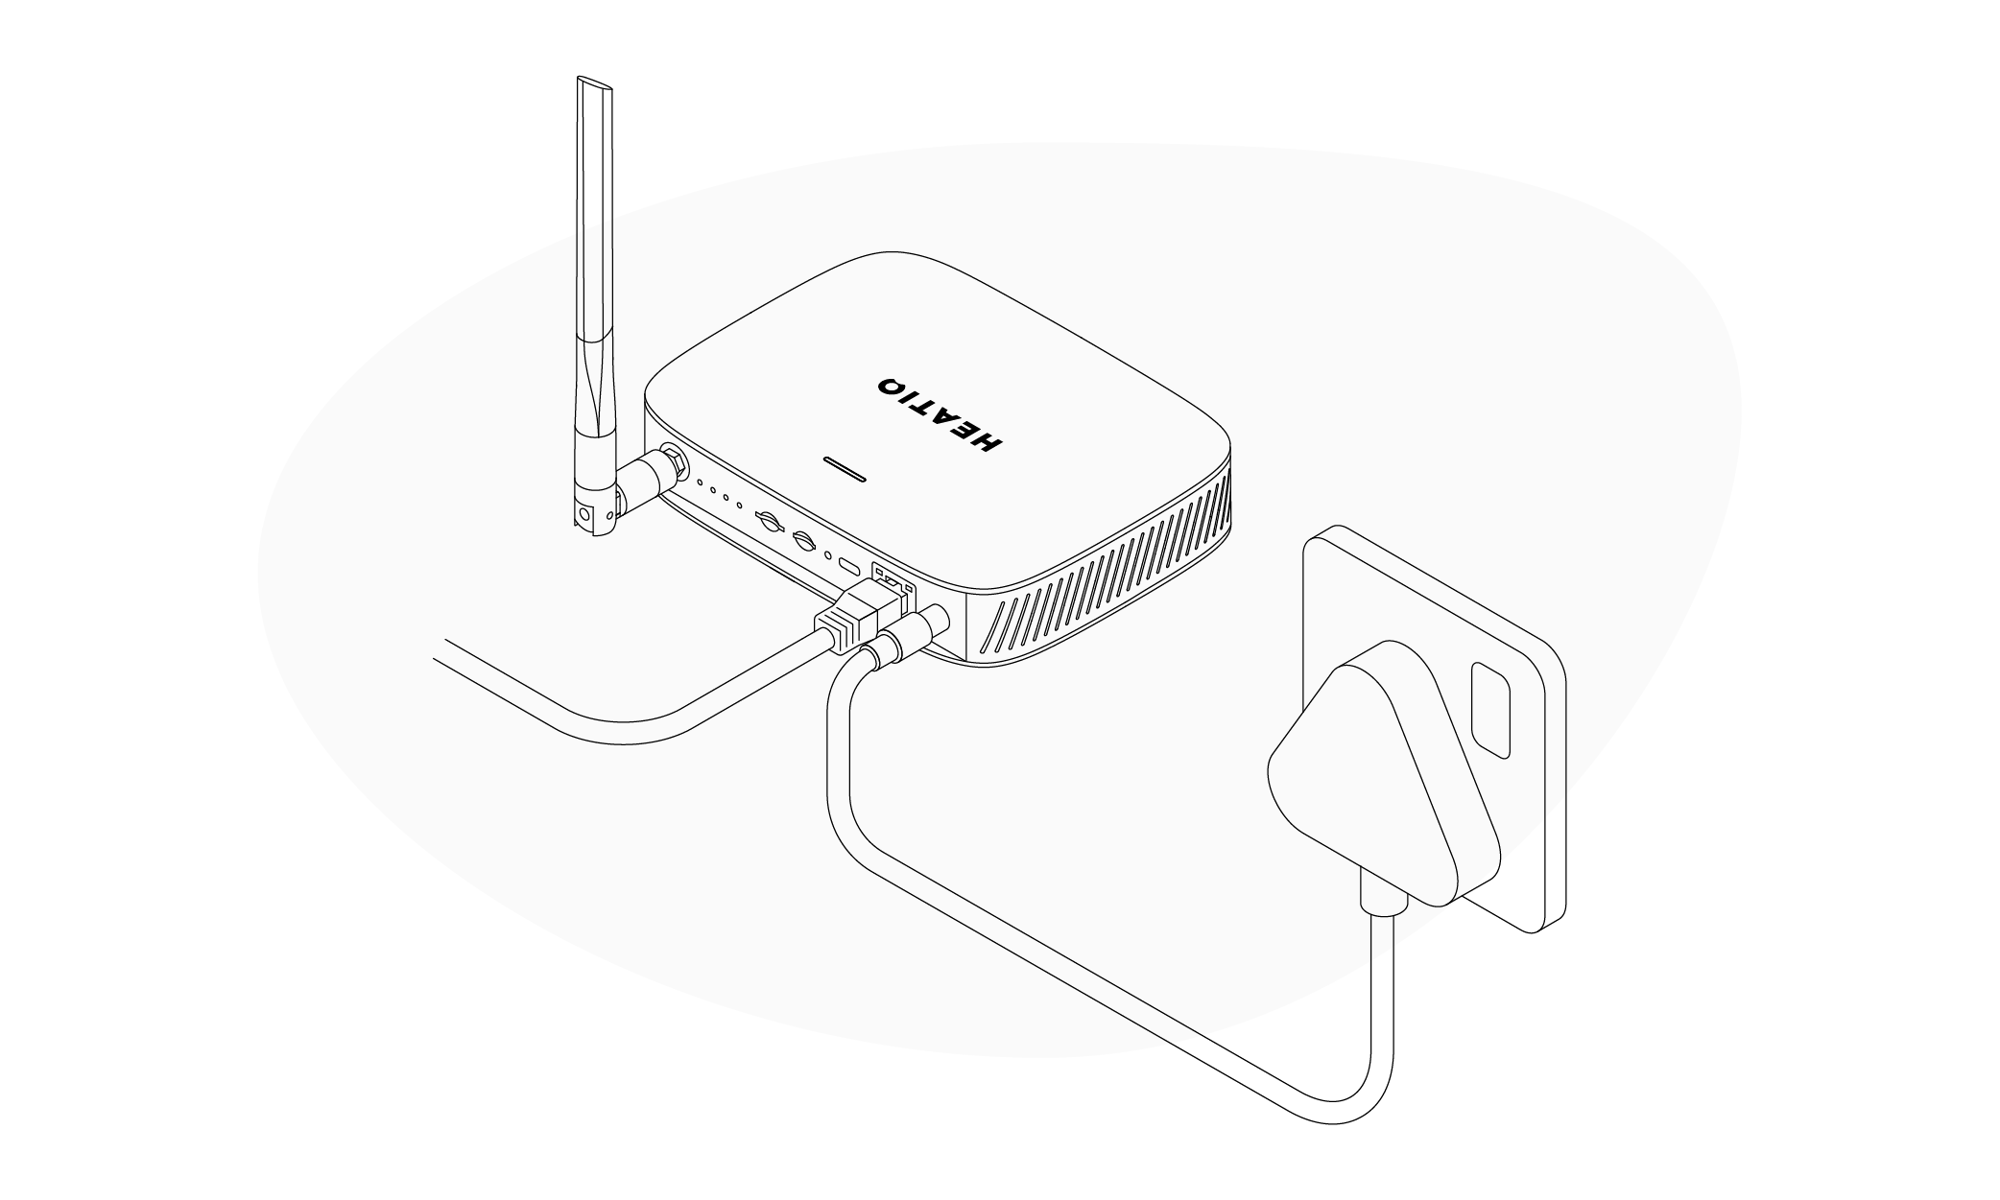
Plug in your gateway
Connect the provided power adaptor to your Heatio gateway and a suitable mains socket.
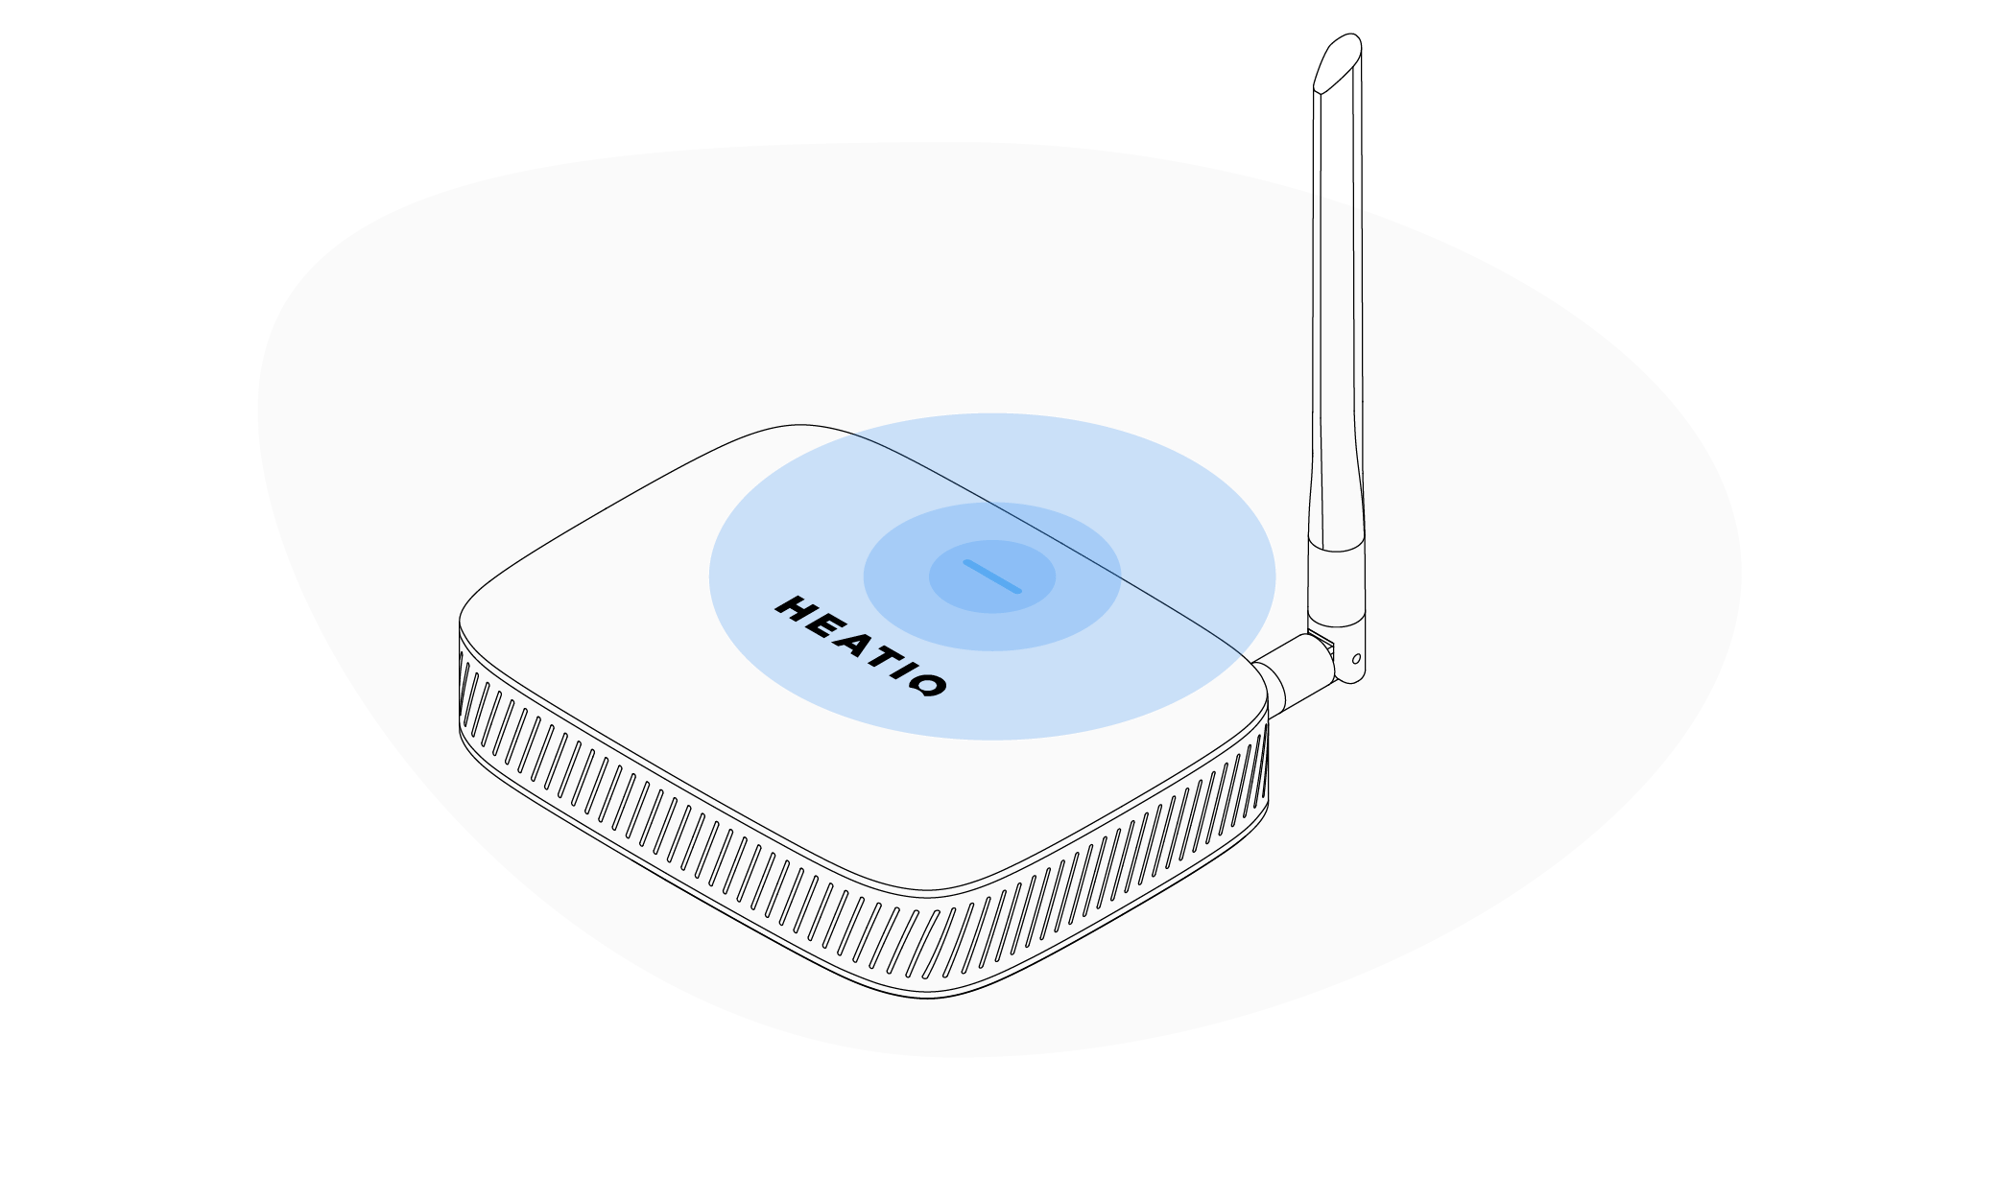
Wait for connection
The light on the top of the Heatio gateway will cycle through distinct colours. When it shows a slow pulsing blue light, the gateway is connected. (this may take 30 mins).
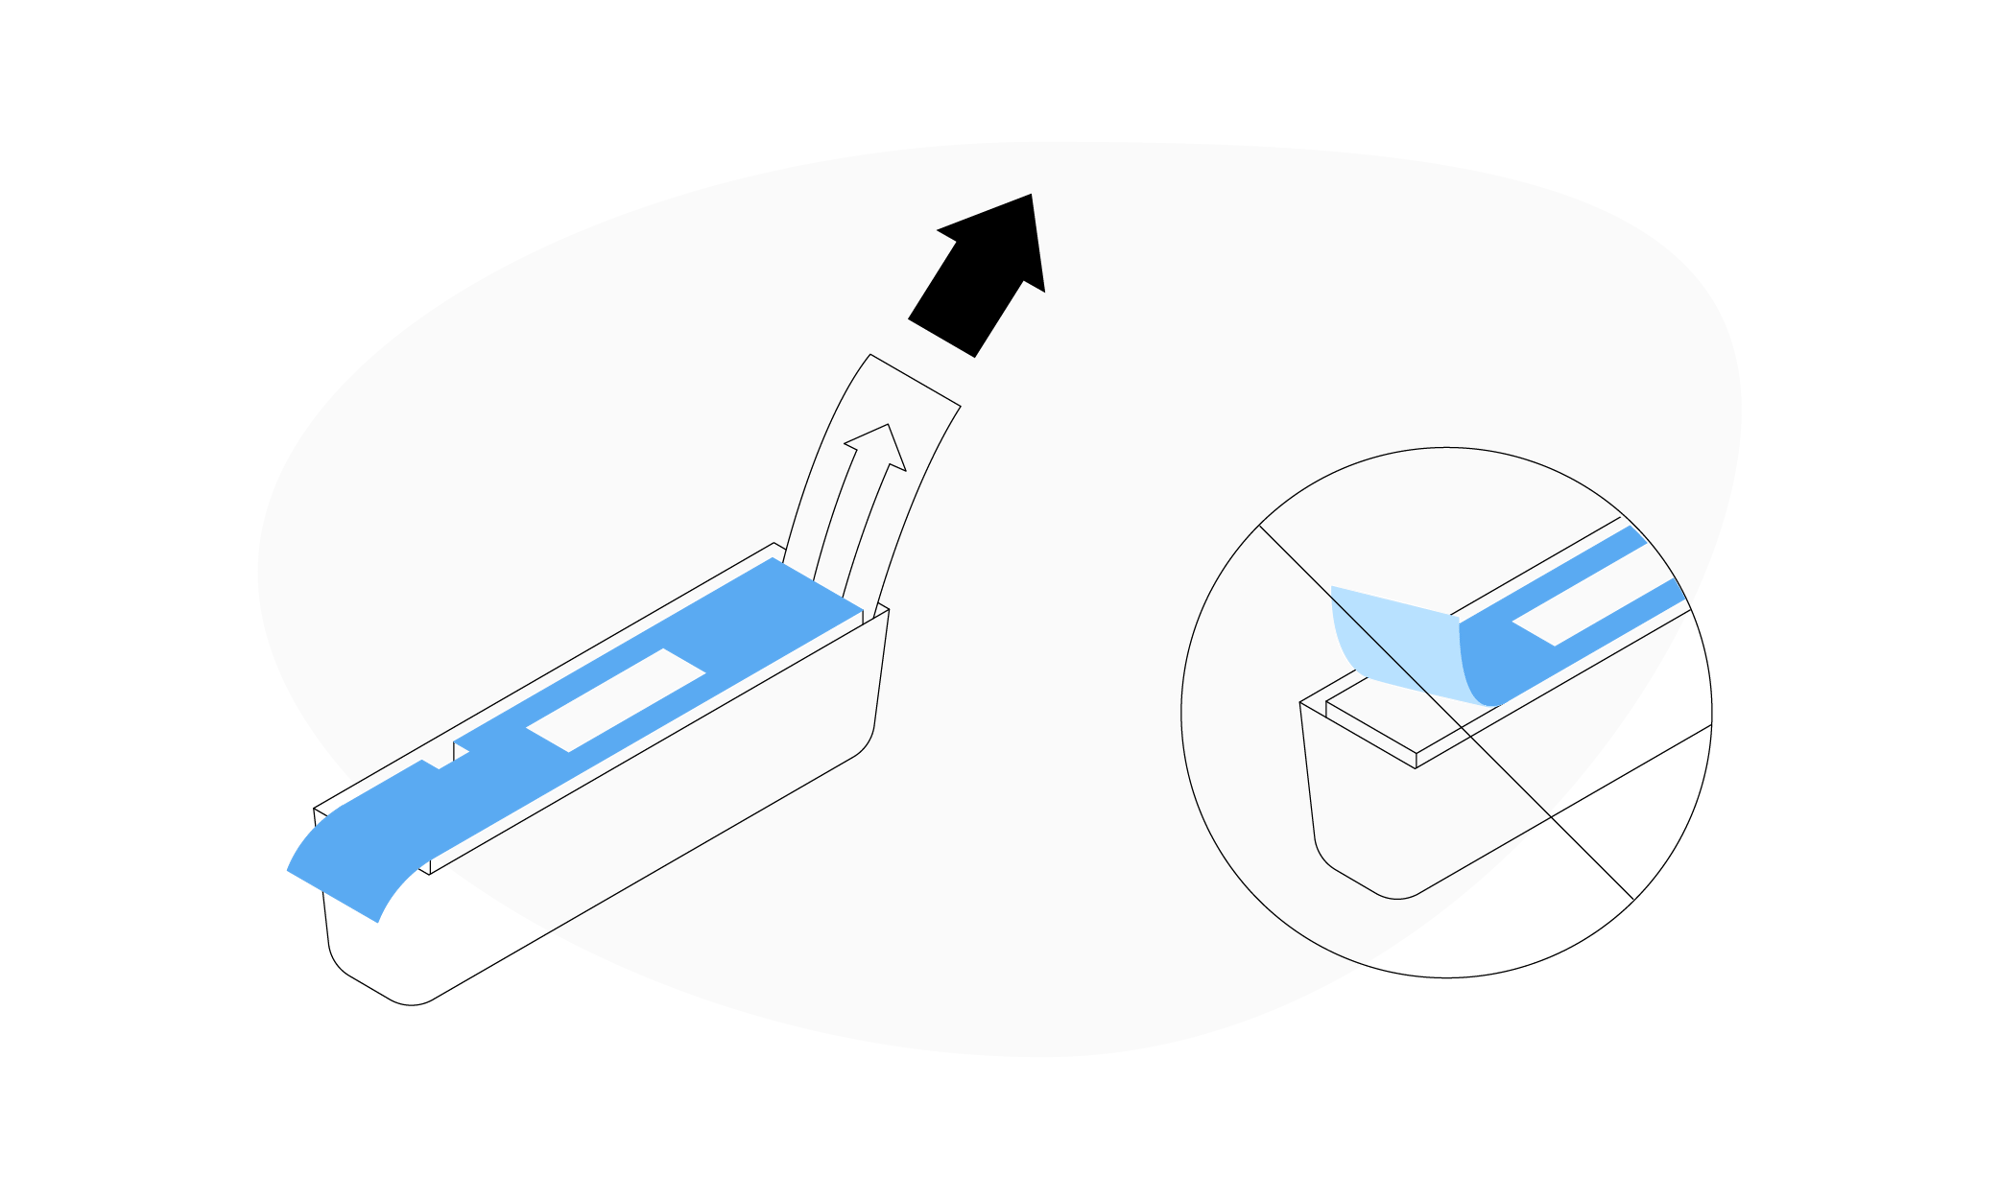
Connect your sensors
The sensors have two plastic tabs - one clear/white and one blue that protects the adhesive strip.
Remove the white strip, NOT the blue one.
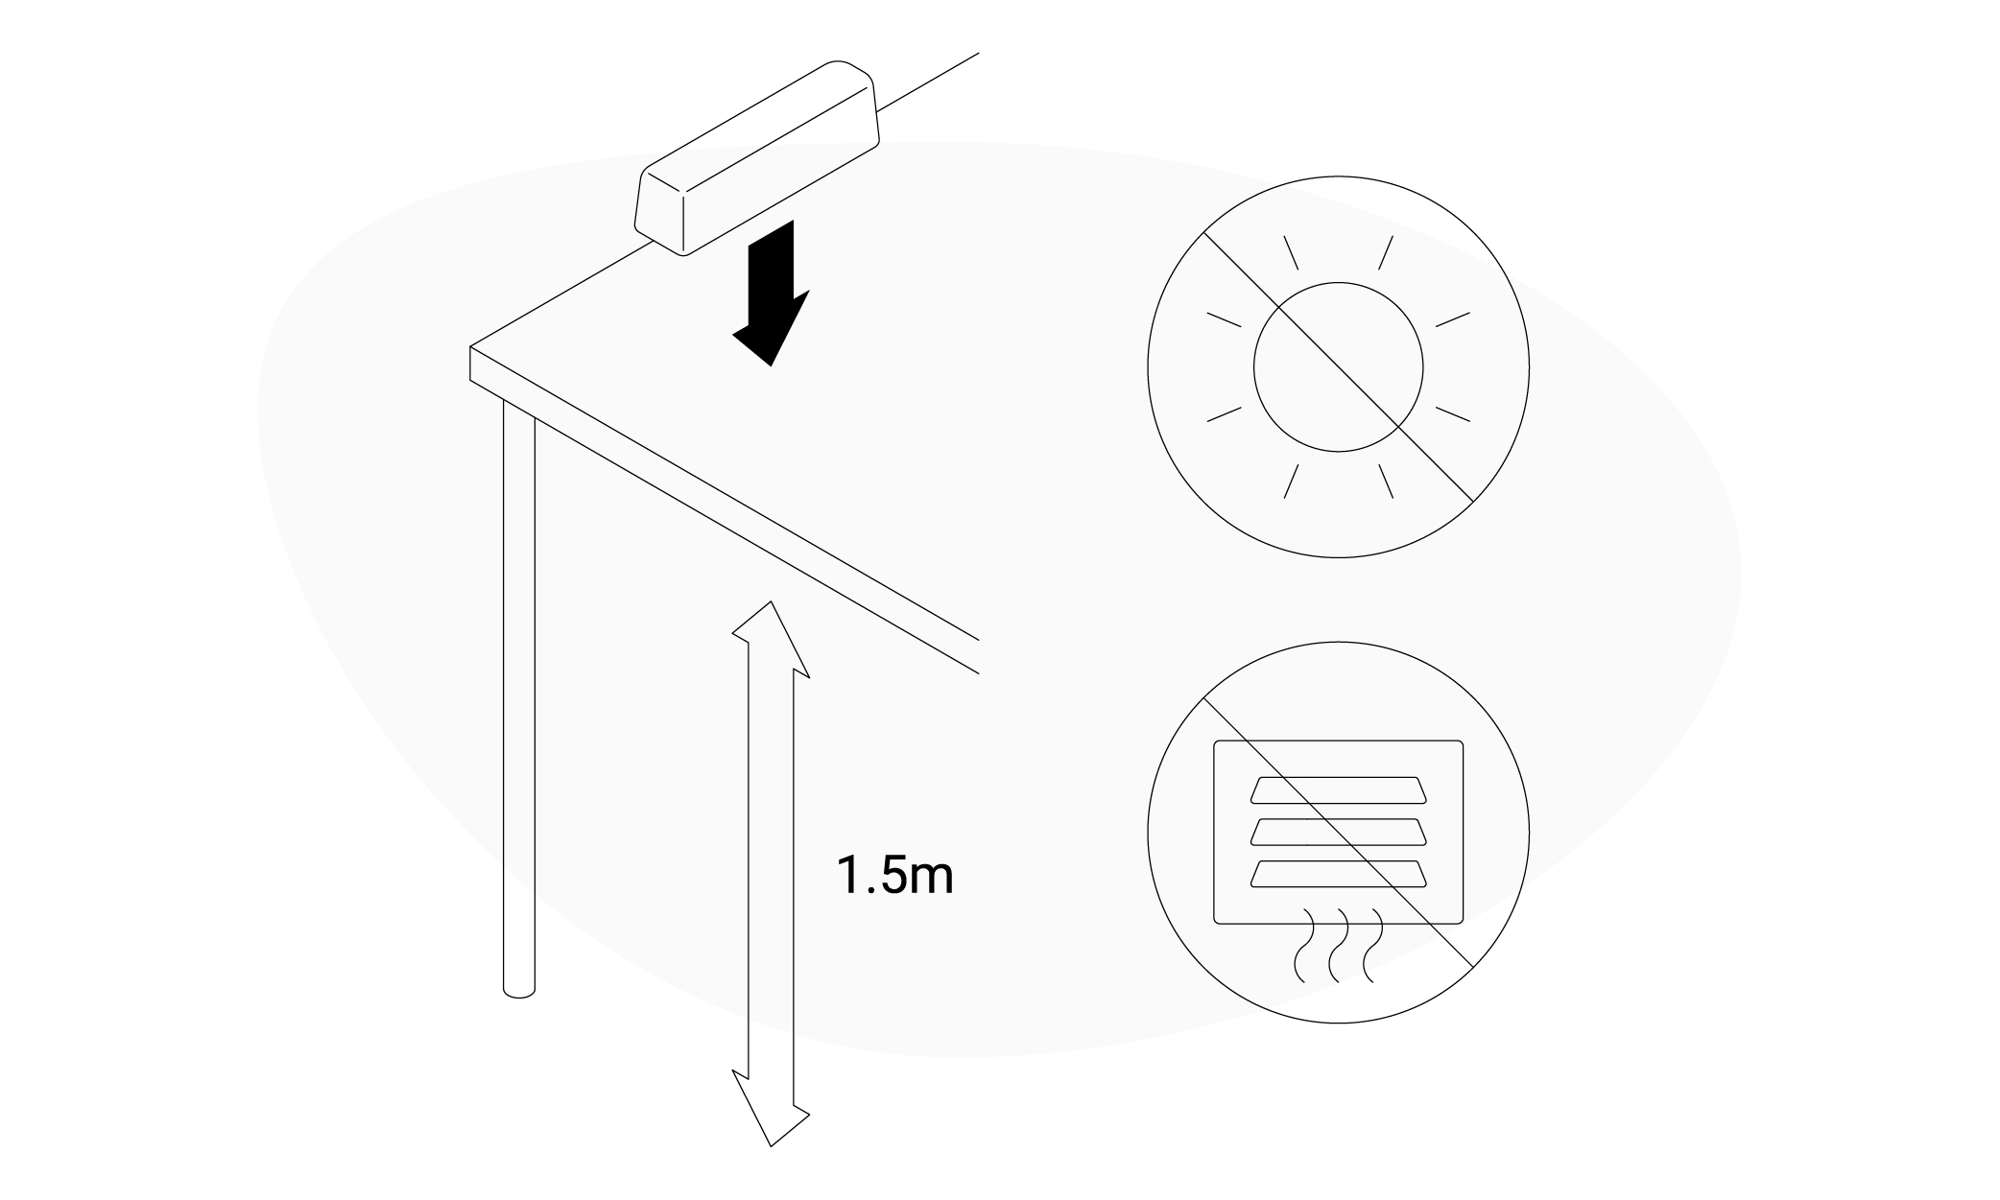
Place the sensors
Place the sensor about 1.5m above the floor or at eye level, either on the wall or on a surface. Make sure that the sensor is not faced by direct sunlight or placed near radiators, open windows or other places where it may measure values that are not representative for the rest of the room.
Make sure that the hole at the bottom of the sensor is not blocked or facing up (to avoid dust collection).
Place one sensor on the ground floor and one on the first floor.
IMPORTANT: The sticker may damage your wallpaper or paint. If unsure leave it on a surface without using the adhesive tape.
Stay connected
Keep the gateway plugged in at all times and try not to change the location of the sensors for the duration of the trail.
Collecting Data
Sit back and relax while we collect the necessary information. During this time you can always login to get insights into your energy and gas consumption.
Check your email
Once we've collected enough data for our calculations we'll send you an email with our findings. This is generally done withing 3-4 months.
The adhesive might cause damage!
Avoid using the adhesive tape on surfaces like wallpaper or painted walls as they may be ruined when removed.
Sensor placement
Place the sensors aprox 1.5 meters above the floor space on a flat surface but not in direct sunlight, near a radiator, or next to a window or vent.
Where to place the 2 sensors
Leave one sensor downstrairs and one upstairs, or in two differnet rooms on the same floor if your property is a bungalow.
Returning the hardware
At the end of the trial we will either arrange collection and send you the label or provide you with directions on how to dispose of the gateway and sensors.
Important safety information
The devices must not be dismantled or modified in any way.
The devices are only intended for indoor use. Do not expose it to moisture.
The devices must never be subjected to shocks or impacts.
Disposal note
At the end of the trial, Heatio will arrange the return of the kit.
If the device is no longer functional, we will get in touch to provide instructions for disposal.
Please note! The devices, as well as all the individual parts, must not be disposed of
with household waste or industrial waste. The sensors contain a lithium battery, which must be disposed of separately.
Why I shouldn't use the adhesive strips on the sensors
The adhesive is quite strong and it might ruin your furnishing.
Due to the limited period of the trial, we recommend that you just leave the sensor and the gateway on a flat surface without mounting them on a wall or sticking them to a surface.
Heatio Ltd will not accept liability for any damage to your walls and/ or furniture.